Mounting a rear fender
Posted on 12th Oct 2014
Mounting a Rear Fender to a Rigid Chassis
By bungking
This is a step by step how to on mounting a ribbed rear fender to a rigid chassis done the Bung King way using a bunch of the parts we sell to make things easier for you.
This is the fender blank that I will be using, as you can see the fender radius already fits the radius of the tire pretty well so there is no need to shrink the edge to create the correct radius that is sometimes needed to be done. The fender is a little long on the front side but I will wait to trim it until it is all mounted up.
I like to when I can, use factory holes that are already in place to give them some sort of purpose. In this case it is a reproduction chassis based on the early original rigid chassis so there is a few holes already in place for the original fender strut. I will be using some of our counterbore bungs in conjunction with these holes for the lower strut mount that supports the rear of the fender. The counterbores can be found athttp://www.bungking.com/bungs-1/counterbored.html
To keep the fender in place with enough gap away from the tire I use some 3/8 fuel line ( The actual outer dia of this tube is approximately 5/8″. The tire the customer wants to use is a bias ply one so some room for tire growth at speed is a must. The tube can simply be tapped down around the tire and wheel assembly with some electrical tape. 
For the rear fender mount I installed some of our Stepped Through Bungshttp://www.bungking.com/bungs-1/stepped-flanged-bungs/stepped-flanged-through-threaded-bungs.html in a 5/16 x 18 thread. These bungs will be welded in place with the flange on the outside of the fender. First just drill two 1/2″ holes where you would like them to live and install the bungs in place with a small tack. By using a threaded bung that has a little standoff from the fender you can help eliminate paint chipping in the future. You simply need to clean of the paint from the face of the bung where the strut will mount and this creates a metal to metal relation with no chance of your custom paint job blistering from the pressure as well as keeping everything tight.
But before I make the rear strut I am going to mount the center of the fender to the chassis. I will be using a few flat tabs with some slotted holes for adjustment later down the road. 
Two of the tabs are tacked to the chassis and the other two are welded to the fender. This bike had a drum brake in the rear making tire changes more difficult with a fender mounted tight to it. So keeping this in mind when creating the mounting system so that the fender can be removed easily with the tire in place so it can be out of the way if the rear wheel needs to be removed.
Once it is all locked down its time to work on the rear strut. I set the bar in place and mark it to be trimmed to size.
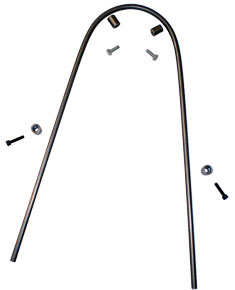
The customer wanted to use the loop style strut. So I started with one of our prebent fender loops, they can be found athttp://www.bungking.com/kits/fender-strut/triumph-bsa-strut-kit.html
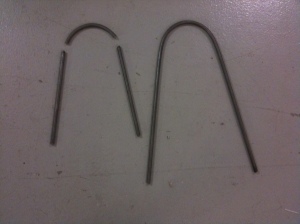
As you can see the fender loop comes extra long so that it can be trimmed to fit. The strut is going to be going directly through the center of the mounting bungs so three separate pieces will be needed.
One all of the pieces are cut to size it is now time to start tacking the pieces into place. As you can see I have taped the fender in place with some electrical tape, it works well for holding things in place, it remains somewhat flexible so slight adjustments can be made after in place for the perfect fit, as well as not leaving any residue behind on your chrome parts.
Here you can see the strut with all of the pieces tacked into place
Next I made a lower mount that mounts to the factory lower render tab. The mount includes a .400″ thick threaded bung welded to the tank and the correct size spacer to fill the gap between the bung and the chassis tab. The lower mount helps keep everything mounted tight and from flopping around or vibrating at speed.
Once it is all tacked together it can be disassembled to be fully welded. Once cooled the fender and sissy bar is mounted back in place to check fitment.
 Loading... Please wait...


