Making t-bars
Posted on 12th Oct 2014
Making T-Bars the Bungking Way
By bungking
 We start by making a cope in the two uprights. The best way we have to do this is in the bridgeport with a rotobroach cutter. The rotobraches are a high end hole saw used mostly in the steel industry. They hold very good tolerances for the best fit and consistancy. If you don’t want to spring for one, you can use a standard holesaw or spend a bunch of time with a die grinder.
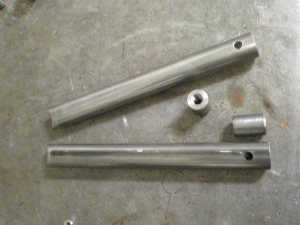 We then cut the uprights to our desired length. The length will be the effective rise the bars will receive. After they are cut to length, we drill two 7/16″ holes 1″ from the base of the upright. This will give us a place to plugweld the threaded riser spud bungs. We carry these threaded bungs for use in either 1 1/4″ x .120 wall or 1″ x .120 wall tube in stainless or mild steel. The link for the page is http://www.bungking.com/bungs-1/handlebar-bungs.html Although we will weld the threaded bung in from the bottom, don’t skip the plug weld; it adds a large amount of stregth to the welded in threaded bung.
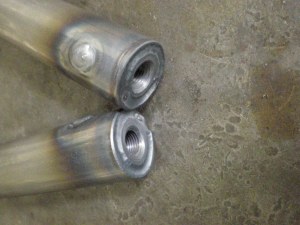 We next fit the threaded riser spud in the bottom of the upright. It should be flush with the tubing, and weld it in place. Take your time welding from the bottom so that you don’t get into the treaded section of the bung.
Next, we bend up the the upper bar for the set of t-bars. You can adjust the bend angle to fit your preferance; this bend is usually between 20-27 degrees. The less of a bend the less effective pullback you will get. Our most common angle is about 22 degrees.
This is a good time to set what width you would like. For a 29″ width with a 22 degree bend, your overall length of the bar would be about 16″. If you are using factory controls the stepped down 1″ section of bar needs to be 7 3/4″ on each side.
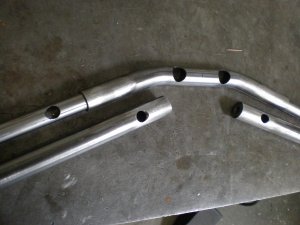
These bars are going to be internally wired so we next drill two 1″ dia holes in the upper section of the t-bar. We drill this using a 1″ rotobroach and the bridgeport again. The full 1″ dia holes will make things easier for you to run wires through. Be sure to de-burr the edges of the holes now so the wires don’t get chafed.
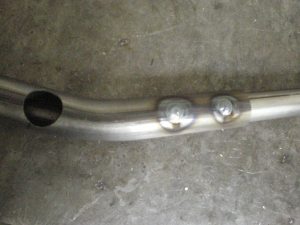
We next drill four 7/16″ holes in the upper bar to plugweld the 1″ tubing inside the 1.25″ upper bar. Be sure you have as much overlap of the two pieces of tubing as you can get, usually we like to see at least 3″ of 1″ tubing inside the upright on each side.
Next, plug weld the 1″ tubing inside the upper bar leaving 7 1/2″-7 3/4″ hanging out of the upper bar. By plug welding instead of welding the seam between the two pieces of tubing, it allows you to seat the control perches all the way against the 1 1/4″ section of tube leaving no gap and a cleaner look.
Now is a good time to grind down all of your plug welds. We like to cut the welds down first with a fine flapper disc and finish with a DA sander. We now also drill holes in the uprights and upper bar to allow a place to run the wires internally. A 5/8-3/4″ hole is usually needed. One set of holes is drilled in the upright just above the threaded insert and another set is drilled in the upper bar 2″ out from the seam of the two sections of tubing.
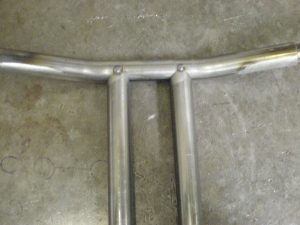
We next bolt the uprights to a jig, an aluminum block with two 1/2″ holes drilled 3.5″ apart, you can also bolt directly to a set of trees if needed. We then tack the upper bar to the two uprights at the desired pitch, this is usually just a few degrees up from a 90 degree angle.
After everything is tacked in place and we have checked to make sure everything is straight and to our desired angle, we fully weld the upper bar to the uprights creating the t-bar. At this point you could be done fabbing the t-bar, but we like to add a few extra steps.
We then prep a set of gussets to go in the upper corners. These are ones we have waterjetted specially for us, but you can custom make some to fit your own style.
Then when you are happy with their location, fully weld them into place. We like to take our time welding to give the welds a quality apperance. We believe a quality weld should be shown off and not need to be ground down.
Next you will need to remove some material from the face of the upper bar to allow room for the brake master cylinder to fit squarely on the T-bar.
You can then drop your newly made custom set of t-bars off to your powdercoater or local chromer. This customer chose a gloss black powdercoated finish.
If you do not want to make them completely yourself or need some parts and bungs to help make them visit http://www.bungking.com/accessories/handlebar.html for an assortment of fully welded handlebars as well as bungs and prebent kits.
 Loading... Please wait...